Adding custom columns to existing models
Some models can be extended with custom columns.
Introduction
In some situations, you may need to exted the existing models from exsiting apps with your own custom columns.
For example, you may want to add the column named favorite_holiday_destination into the model for storing data about customers (see Customers app) in the addressbook. With this very valuable information, you might be able to attract your potential customer in a unbeatable way, just by knowing what is his favorite holiday destination.
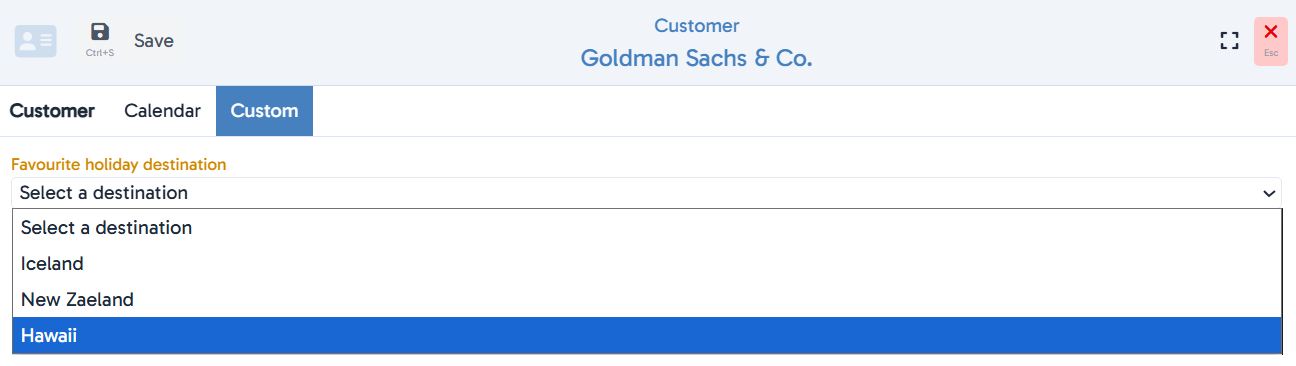
Then, you want to have only three options of these destinations, let's say Iceland, New Zaeland and Hawaii.
And, you want to have this information available when you open the addressbook - list of customers.
Given all that, you definitely need to extend the model for customers by following column:
| Property | Value |
|---|---|
| name | favorite_holiday_destination |
| type | varchar with enum values |
| allowed values | Iceland, New Zaeland and Hawaii |
To add a column to any model, you need to:
- Extend the Hubleto's config by definition of columns to add. See example below.
- Create the column in the database.
Modify config
To add the definition of the column into the config, you may either modify ConfigEnv.php file or navigate to Settings -> Platform config and add an appropriate configuration value.
The ConfigEnv.php sholud look like this:
./ConfigEnv.php
...
$config['models']['Hubleto\\App\\Community\\Customers\\Models\\Customer']['customColumns'] = [
  'favorite_holiday_destination' => [
    'class' => \ADIOS\Core\Db\Column\Varchar::class,
    'title' => 'Favourite holiday destination',
    'enumValues' => [ 0 => '-- Select a destination --', 1 => 'Iceland', 2 => 'New Zaeland', 3 => 'Hawaii' ],
  ],
];
...
Adding a favorite_holiday_destination column to the model for customers.
If you prefer to do it via Hubleto, navigate to Settings -> Platform config, click Add and add following:
Path:
models/Hubleto\App\Community\Customers\Models\Customer/customColumnsValue:
{
  "favorite_holiday_destination": {
    "class": "Varchar",
    "title": "Favourite holiday destination",
    "enumValues": ["Select a destination", "Iceland", "New Zaeland", "Hawaii"]
  }
}
Create the column in the database
Once you configured Hubleto, you need to create the column in the database.
To do this, simply navigate to Tools -> Developer tools -> Check DB consistency and run the SQL command that Hubleto prepared for you automatically:

If successfull, you should see following:

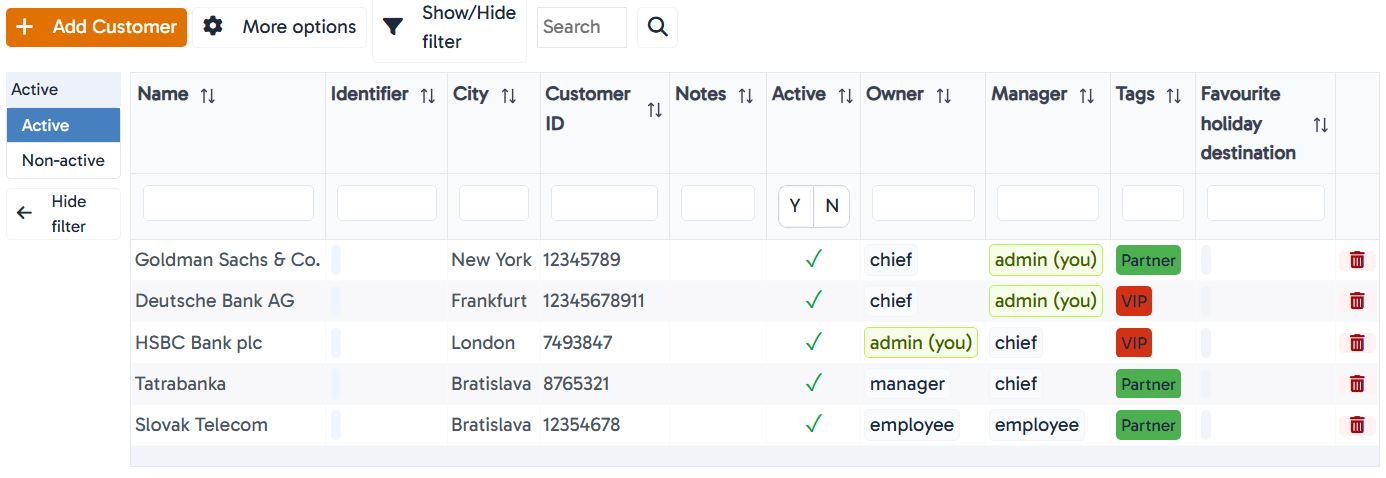
Final result
Now, you should see your new column both in the list of customers and in the form for creating or editing customer.
Conclusion
You can extend any model with your custom columns. To do so, you need to extend the Hubleto's config (e.g. in ConfigEnv.php file) and to create the column in the SQL database (e.g. by manually running the SQL command).